A CLI tool that creates heads-up displays
for your freediving videos,
automatically tracking depth and time
from your dive computer logs or manual input.
↘ Quick Links ↙
Features • Installation • Usage • No Dive Computer? • How It Works • Contribution • License • Contact
↘ Share the project's link to your friends ↙
Key features of depthviz include:
- 100% free and open-source for all freedivers, with or without a dive computer.
- Cross-platform support for Windows, macOS, and Linux.
- Supports various dive computer data formats, including Apnealizer, Shearwater, Garmin, and Suunto.
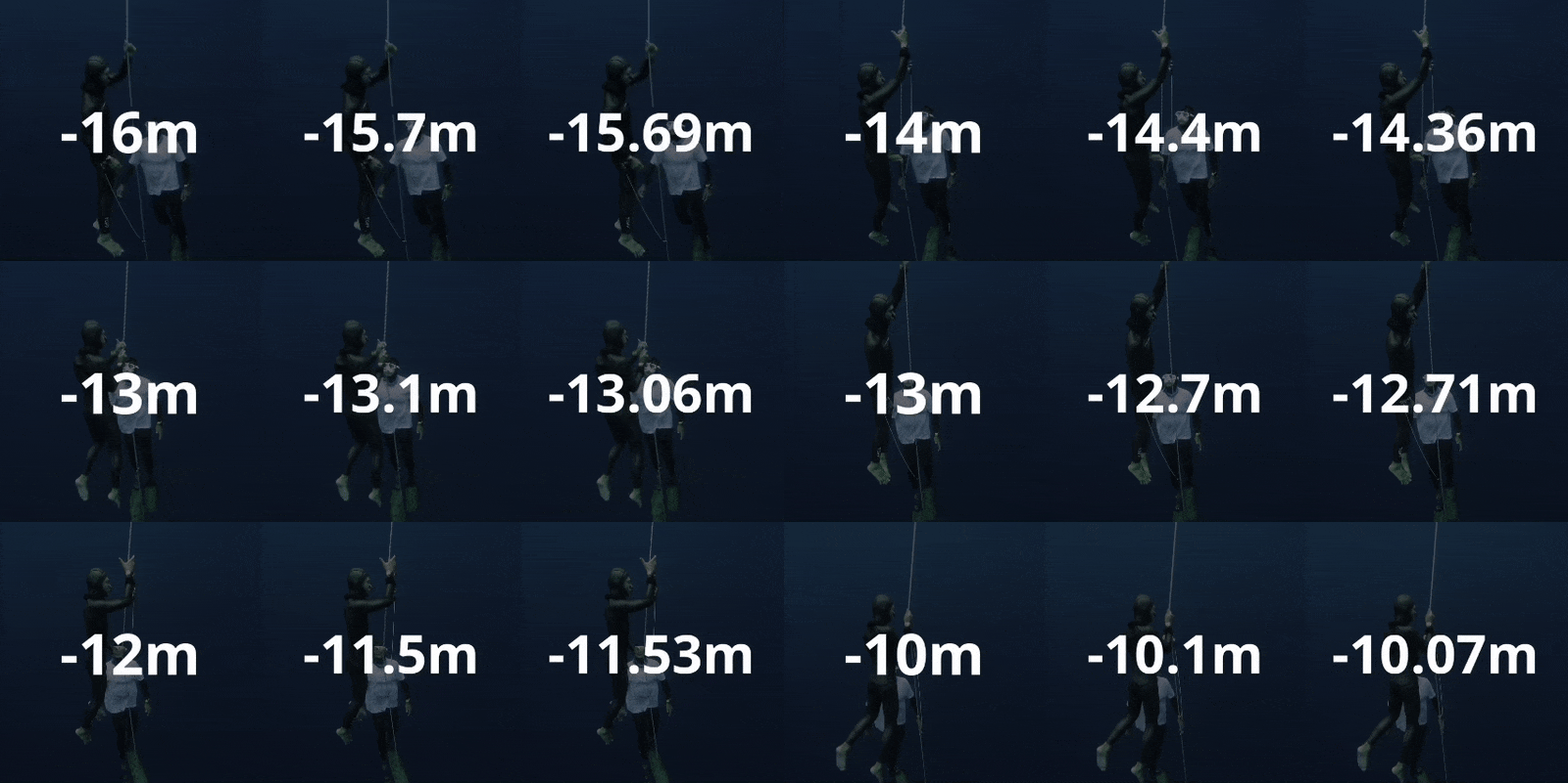
- Customizable display with options for decimal places, font, background color, and stroke width.
- Works with free video editors like CapCut and much more.
- Automatically generates a depth overlay video from your dive log data.
- Generates the time overlay as a separate video to display the time elapsed during the dive.
- Linear interpolation to fill in gaps in the dive log data for a smooth depth profile.
Tip
For performance freedivers, you can incorporate depthviz into your dive analysis. By visualizing your dive profile, you can identify areas for improvement and track your progress over time.
If you like depthviz and find it useful, please click a 👁️ Watch button to avoid missing notifications about new versions, and give it a shiny 
Don't forget to share depthviz with your freediving community! 🌊
Prerequisites:
Install:
Run the following command in your terminal to install depthviz using pipx:
pipx install depthvizUpgrade:
When a new version is released, you can upgrade to the latest version using the following command:
pipx upgrade depthvizYou can check the installed version by running:
depthviz --version- ✅ If you have a dive computer:
Export your dive log from your dive computer or diving application. See the Data Source for supported formats. - 🚫 If you don't have a dive computer:
Record your dive profile manually using depth markers in your footage. See the No Dive Computer? section for more details.
Use depthviz to generate a depth overlay video from your dive log.
depthviz -i <input_file> -s <source> -o <output_video.mp4>| Option | Short | Values | Description |
|---|---|---|---|
--input |
-i |
File path | Path to your dive log file. |
--source |
-s |
apnealizer,shearwater,garmin,suunto,manual |
Source of the data. (See the Data Source for more details.) |
--output |
-o |
File path | Path or filename for the generated video. File format must be .mp4. |
Example Command
Example of generating a depth overlay video named depth_overlay.mp4 using data from 123456_ACTIVITY.fit exported from Garmin Connect.
depthviz -i 123456_ACTIVITY.fit -s garmin -o depth_overlay.mp4| Option | Values | Default | Description |
|---|---|---|---|
-d, --decimal-places |
0-2 |
0 |
Number of decimal places to display in the depth overlay. |
--no-minus |
- | - | Hide the minus sign for depth values (e.g., display 10m instead of -10m). |
--font |
File path | Default font | Path to a custom font file for the text. |
--bg-color |
Color name or hex | black |
Background color (e.g., green, '#000000'). |
--stroke-width |
Positive integer | 5 |
Width of the stroke around the text in pixels. |
Example Command with Advanced Options
Example of generating a depth overlay video named mydive.mp4 using data from 123456_ACTIVITY.fit exported from Garmin Connect:
depthviz -i 123456_ACTIVITY.fit -s garmin -o mydive.mp4 --decimal-places 1 --no-minus --bg-color green --font ~/Downloads/font.ttf- The depth values will be displayed with one decimal place.
- The minus sign will be hidden.
- The background color will be set to green.
- A custom font file at
~/Downloads/font.ttfwill be used for the text.
Tip
Use the --decimal-places option to control the precision of the depth display (e.g., --decimal-places 1 displays depths like -12.5m)
You can also generate a time overlay video as a separate video that displays the time elapsed during the dive. It will be exported in the same directory as the depth overlay video.
| Option | Values | Description |
|---|---|---|
--time |
- | Create a time overlay video. |
Example Command with Time Overlay
Example of generating a depth overlay video named mydive.mp4 and a time overlay video by adding the --time option:
depthviz -i 123456_ACTIVITY.fit -s garmin -o mydive.mp4 --timeThe time overlay video will be automatically generated and saved in the same directory as the depth overlay video with the filename mydive_time.mp4.

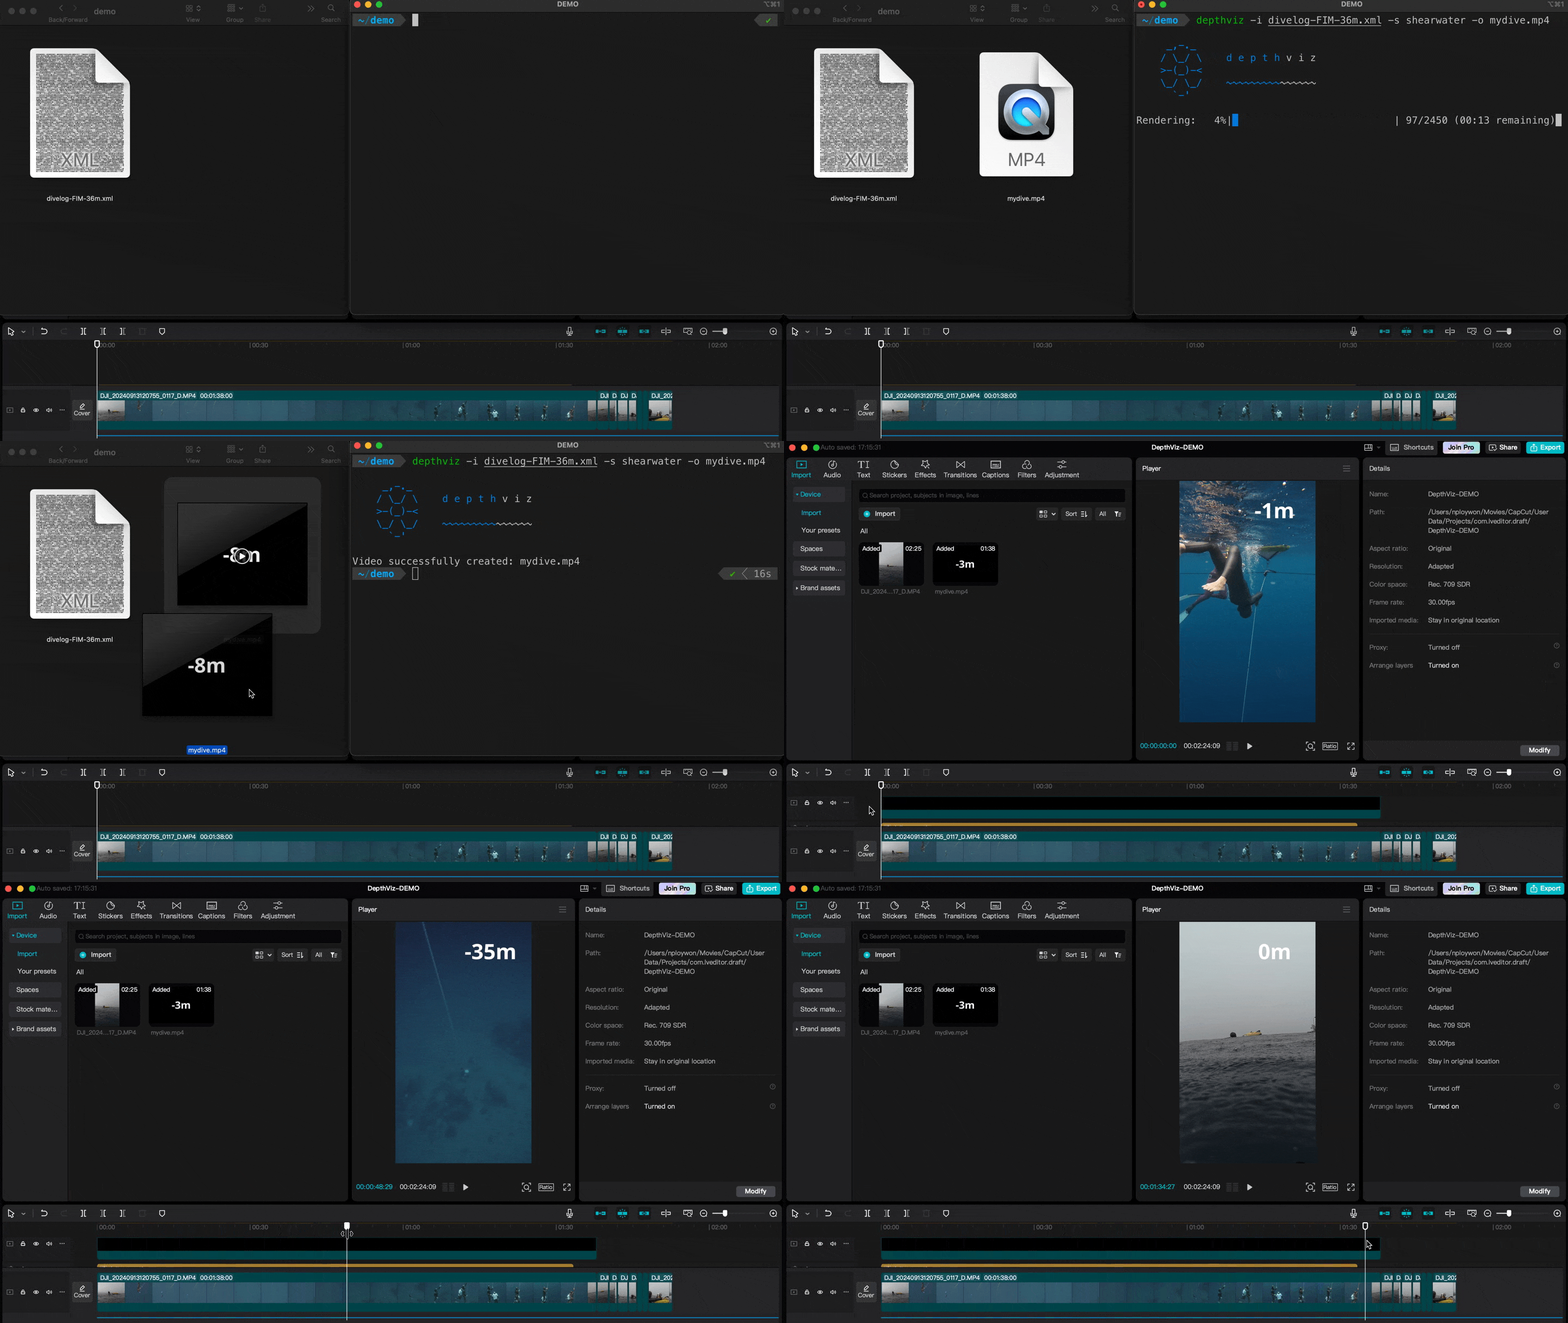
Import the generated depth overlay video and time overlay video (if used) into your preferred video editing software. Combine them with your original dive footage. Remove the background color if needed. Adjust position of the overlays to suit your video style.
Watch this short tutorial on how to import an overlay video in CapCut Desktop.
Tip
Chroma Keying: If you want to remove the background color from the overlay video, you can use the chroma key effect in your video editor. You can use the --bg-color option to set the background color to match your video editor's chroma key color. --bg-color green is a common choice.
No Dive Computer, No Problem! You can still create a depth overlay video by manually inputting your dive log using the -s manual source option.
Example Command:
depthviz -i manual_input.csv -s manual -o output_video.mp4Freediving ropes with depth markers can help you record your dive profile manually. Use the depth markers in your footage as reference points to manually record your dive profile. Simply note the time and depth at each marker point to create your dive log.
 |
|---|
| Example of a Freediving Rope with depth markers. |
Manual Mode Input File Format:
The input file for manual mode should be a CSV file with the following columns:
Time: The time in seconds (e.g.,0,1,2, ...).Depth: The depth in meters (e.g.,10,9,8, ...).
You don't need to record the depth at every second. Record the depth at each time point where a depth marker is visible in your footage. depthviz will interpolate the depth values between the recorded points to create a smooth depth profile.
Tip
To quickly generate a basic depth overlay, you can record just three points: the start (0m), the maximum depth, and the end (0m). depthviz will handle the rest! For more complex dives (e.g., dives with significant variations in descent/ascent rate or bottom time), more data points are recommended.
Here is an example of a manual mode input file:
| Time | Depth |
|---|---|
| 0 | 0 |
| 6 | 5 |
| 12 | 10 |
| 19 | 15 |
| 26 | 10 |
| 33 | 5 |
| 39 | 0 |
Download the example input file and try it out:
depthviz works by parsing dive log data exported from various dive computers (or manually inputting dive data) and generating an overlay video that displays depth information.
Dive computers typically record either depth directly or pressure data. If the data is recorded as pressure, it is in the form of absolute pressure, which includes both atmospheric pressure and the pressure exerted by the water itself (hydrostatic pressure).
To determine the depth, depthviz uses the following approach:
-
If the dive log contains depth data directly:
depthvizuses this data directly. -
If the dive log contains pressure data:
- First, the hydrostatic pressure is calculated by subtracting atmospheric pressure (collected during the surface interval or dive start) from the absolute pressure:
- Then, the fluid pressure formula is used to calculate the depth:
Where:-
$P$ is the fluid pressure, -
$\rho$ is the density of the fluid (water), -
$g$ is the acceleration due to gravity (9.80665 m/s²), -
$h$ is the height (or depth) of the fluid column (what we want to calculate).
-
- Rearranging the formula to solve for depth (
$h$ ):
- First, the hydrostatic pressure is calculated by subtracting atmospheric pressure (collected during the surface interval or dive start) from the absolute pressure:
Currently, depthviz uses a water density (
The water density can vary depending on the type of water (e.g., freshwater, saltwater). Even different locations in the ocean can have varying densities. This variability can affect the accuracy of depth calculations. For more precise measurements, users may need to adjust the density value based on their specific diving environment. Especially for freshwater diving, the water density is lower than the standard value, which can lead to depth overestimation. We will add support for custom water density in future releases.
Note
The EN13319 standard ensures the accuracy and reliability of depth measurements in dive computers. For more information, you can refer to the EN13319 standard.
- Fill in the Gaps: Different dive computers have different sampling rates, and the data may not be recorded at regular intervals. If the dive log data contains gaps or missing values,
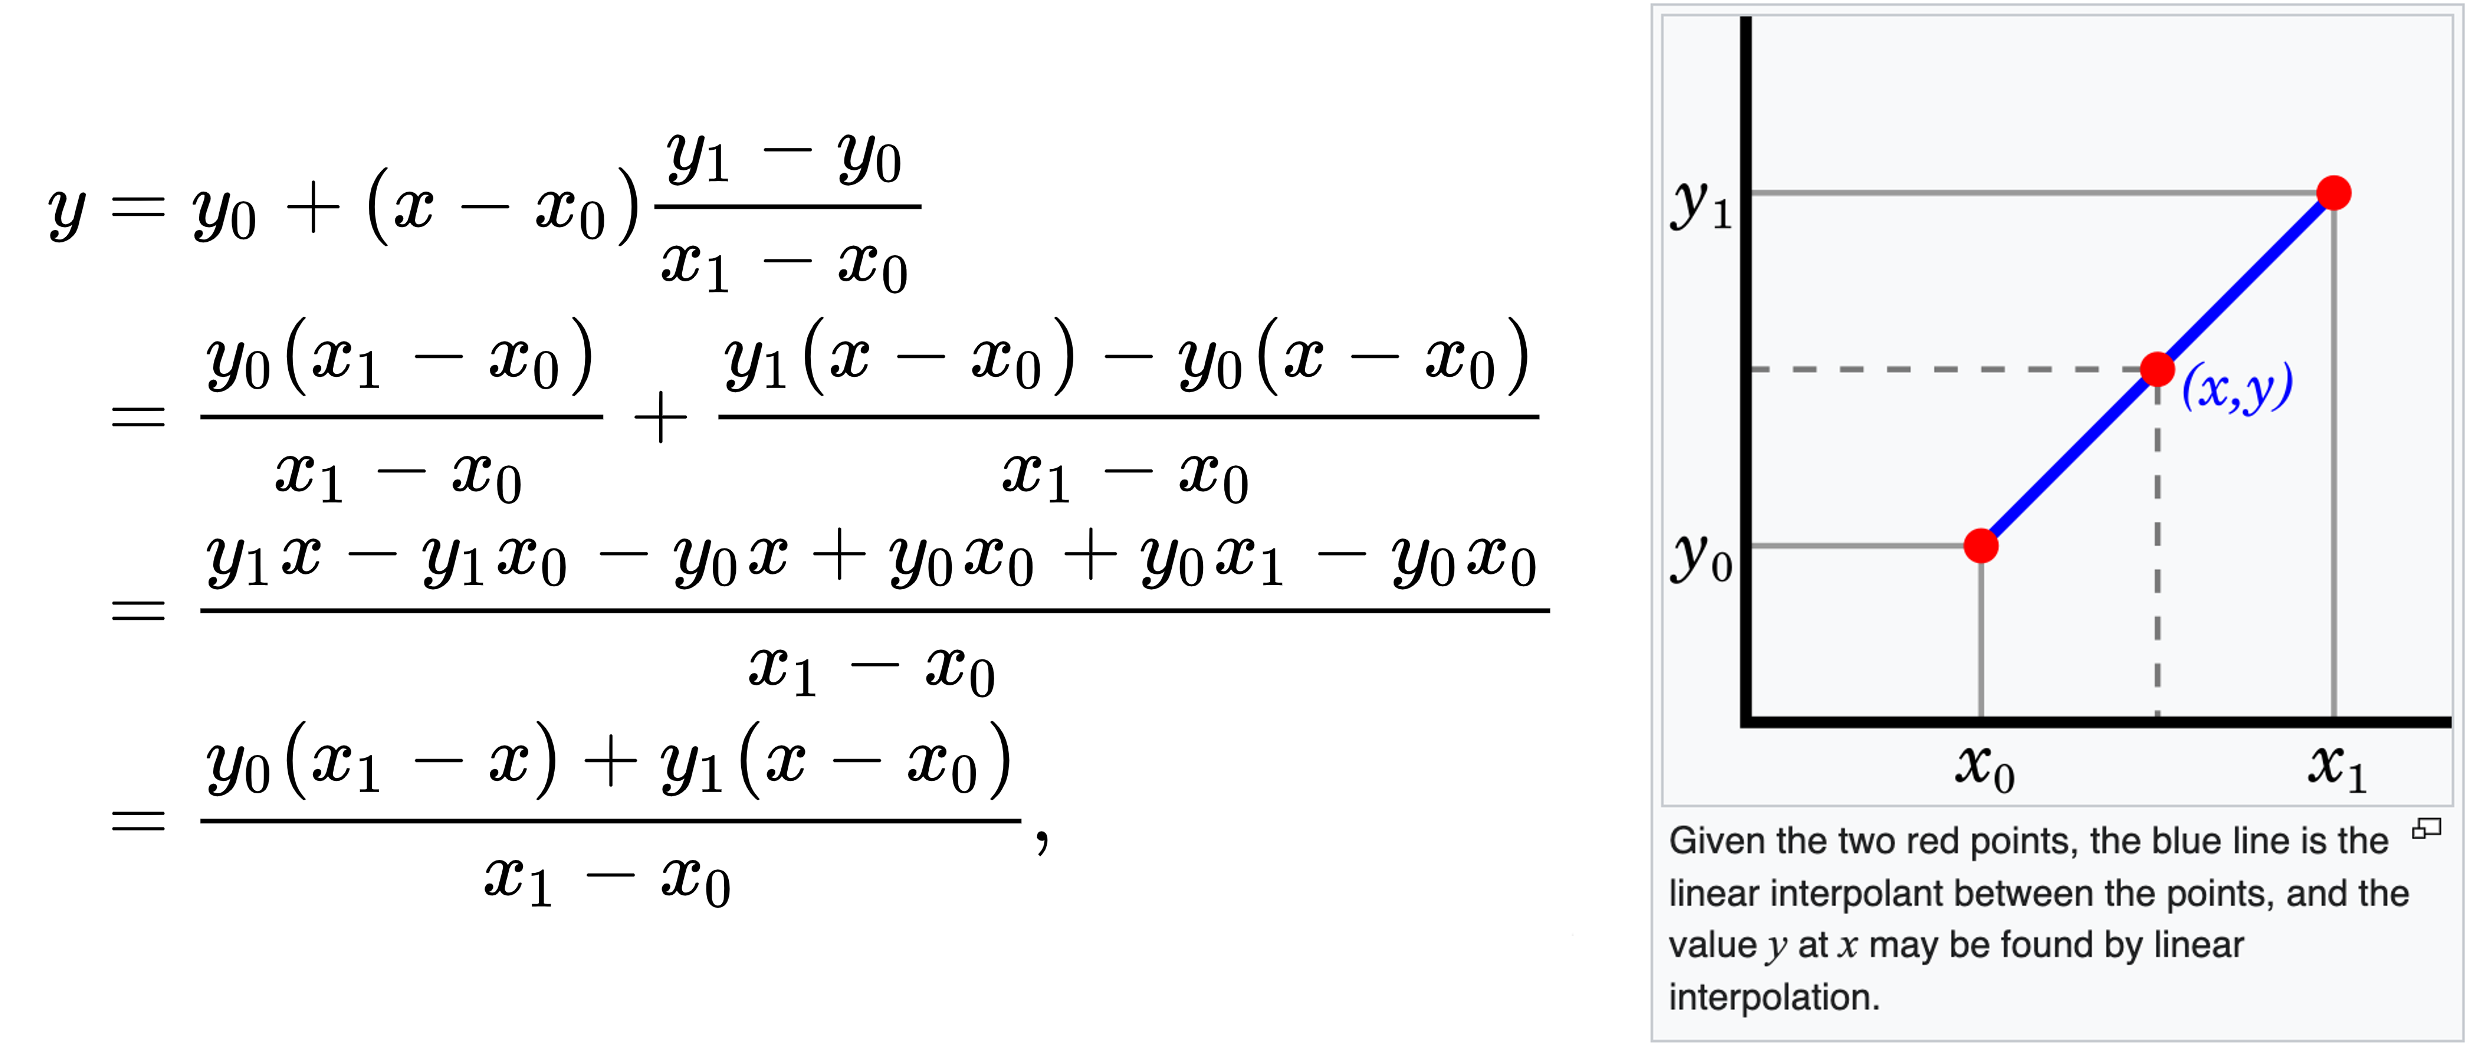
depthvizuses Linear Interpolation to estimate the depth at those points. This method calculates the depth at each time point by interpolating between the two nearest known depth values recorded by the dive computer. This will help ensure a smooth and continuous depth profile in the overlay video.
Note
Learn more about the Linear Interpolation method and how it is used to estimate values between two known depths.
- Generate Overlay Video: The depth information from the linearly interpolated data is rendered into an overlay video, displaying the depth over time. This overlay can then be combined with your original dive footage in your video editor.
We welcome contributions to the depthviz project! If you have any ideas for improvement, bug fixes, or feature suggestions, feel free to open an issue to discuss or submit a pull request.
Missing your dive computer? Help us add support! If you have a dive computer that is not currently supported by depthviz, you can help us by donating a sample dive log file exported from your device. This will allow us to analyze the data format and implement the necessary parsing logic to add support for your device.
To share your dive data, please follow the detailed instructions in our Donate My Dive guide.
depthviz is free and open-source software licensed under the Apache License 2.0, created and supported by Noppanut Ploywong with ❤️ for fellow freedivers.
This project provides a CycloneDX Software Bill of Materials (SBOM) in JSON format. The SBOM is generated by the GitHub Actions workflow and is available as an artifact for each release. The SBOM is generated using the cyclonedx-python library.
For any inquiries, please open an issue or contact the maintainer at [email protected].


-black?style=for-the-badge&logo=x)


